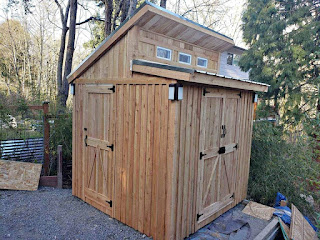
When it comes to maximizing the functionality of your outdoor shed, insulation is a crucial factor to consider. Insulating your lean-to shed can provide numerous benefits such as keeping the interior warm during winter, maintaining a cool temperature during summer, preventing mold growth, and improving energy efficiency.
Why Insulate a Lean-to Shed?
Insulating your lean-to shed is an investment that can pay off in the long run. Here are some of the benefits of adding insulation to your shed:
Better temperature control: Insulation helps to maintain a comfortable temperature inside your shed, regardless of the weather outside. This means that you can use your shed all year round.Prevents mold and mildew: Proper insulation can help prevent moisture buildup, which can lead to the growth of mold and mildew. This can keep your shed clean and healthy.Energy efficiency: Insulation can reduce the amount of energy needed to heat or cool your shed. This can save you money on your energy bills over time.Noise reduction: Insulation can also help to reduce noise levels from outside the shed, making it a more peaceful space to work in.
Types of Insulation
There are several types of insulation available for lean-to sheds. The most common types are:
Fiberglass insulation: This type of insulation is made of fine glass fibers and is the most popular choice for sheds. It is relatively easy to install and is also affordable.Spray foam insulation: This type of insulation is sprayed into the walls and ceilings of your shed. It provides better insulation than fiberglass but can be more expensive.Reflective insulation: This type of insulation uses a reflective material to bounce heat away from the shed. It is ideal for sheds that are exposed to direct sunlight.
How to Insulate a Lean-to Shed
Insulating a lean-to shed is a relatively simple process that can be done in a weekend. Here are the steps to follow:
Step 1: Prepare the Area
The first step is to prepare the area where you will be installing the insulation. This means cleaning out any debris or clutter and making sure the walls and ceiling are free of dust and dirt. You should also make sure there are no leaks or gaps in the shed that could cause air to escape.
Step 2: Measure the Area
Once the area is prepared, you will need to measure the walls and ceiling to determine how much insulation you will need. This will help you avoid running out of insulation or buying too much.
Step 3: Install the Insulation
Next, you will need to install the insulation. If you are using fiberglass insulation, you can simply roll it out and cut it to size using a utility knife. For spray foam insulation, you will need to follow the manufacturer's instructions carefully.
Step 4: Seal Any Gaps
After the insulation is installed, you should seal any gaps or cracks to prevent air from escaping. This can be done using caulking or weather stripping.
Step 5: Add a Vapor Barrier
Adding a vapor barrier to the walls and ceiling can help prevent moisture buildup and mold growth. A vapor barrier can be made of plastic sheeting or special vapor barrier paint. It should be installed on the warm side of the insulation.
Step 6: Finish the Interior
After the insulation and vapor barrier are installed, you can finish the interior of your shed. This can include adding drywall or paneling to the walls and ceiling.
Tips for Insulating a Lean-to Shed
Here are some additional tips to keep in mind when insulating your lean-to shed:
Wear protective gear such as gloves, a mask, and goggles when installing insulation.
Make sure to properly seal any gaps or cracks in the shed to prevent air leakage.
Consider adding a vent to allow for air flow and prevent moisture buildup.
Be mindful of any electrical wiring or plumbing in the shed when installing insulation.
Conclusion
Insulating your lean-to shed can provide numerous benefits and is a relatively simple process. By following the steps outlined above and taking the necessary precautions, you can create a comfortable and energy-efficient space that you can use all year round.


