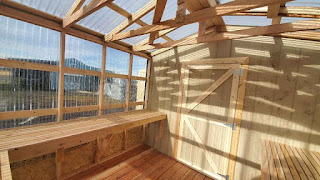
Building a 10x12 lean-to shed can be a great addition to your backyard, providing extra storage space for your tools, equipment, and outdoor gear. Whether you're a seasoned DIYer or just starting out, building a shed is an achievable project that can be completed over a few weekends. In this step-by-step guide, we'll walk you through the process of building a 10x12 lean-to shed from start to finish.
Materials List
The first step in building a shed is to gather all the necessary materials. Here's a list of the materials you'll need:
- 4x4 pressure-treated lumber (for the foundation)
- 2x4 and 2x6 lumber (for framing)
- Plywood (for sheathing)
- Roofing materials (shingles or metal)
- Double doors and hardware
- Screws, nails, and other fasteners
- Tools (circular saw, drill, hammer, level, etc.)
Make sure to measure and cut all lumber and plywood to the appropriate lengths before starting construction.
Step-by-Step Guide
Step 1: Prepare the site
The first step in building a shed is to prepare the site. Choose a flat and level area of your backyard where you want the shed to be located. Use stakes and string to mark out the perimeter of the shed, and then dig a shallow foundation for the shed. Fill the foundation with gravel or crushed stone to create a level surface.
Step 2: Build the foundation
Use 4x4 pressure-treated lumber to build the foundation of the shed. Cut the lumber to the appropriate length, and then use a level to ensure that the foundation is level and square. Anchor the lumber to the ground using stakes or concrete anchors, and then add a layer of gravel or crushed stone to the top of the foundation.
Step 3: Build the frame
Next, it's time to build the frame of the shed. Use 2x4 and 2x6 lumber to construct the frame, following the plans for the shed. Make sure to use a level and square to ensure that the frame is straight and true. Secure the frame together using screws or nails, and then add diagonal bracing to provide extra stability.
Step 4: Sheath the walls and roof
After the frame is complete, it's time to sheath the walls and roof of the shed. Use plywood to cover the frame, starting with the walls and then moving onto the roof. Make sure to leave space for any windows or doors that will be installed, and cut out holes as needed.
Step 5: Install the roof
Now that your shed walls are up, it's time to add the roof. You'll need to install the roof trusses first, then the roof decking, and finally the roofing material.
Start by attaching the trusses to the top plates of the shed walls, spacing them evenly. Then, add the roof decking, which can be made from plywood or OSB. Secure the decking to the trusses with screws, making sure to stagger the seams.
Finally, add the roofing material of your choice. Popular options include asphalt shingles or metal roofing panels. Follow the manufacturer's instructions for installation, taking care to properly seal all edges and joints.
Finish the Exterior
With the roof installed, your shed is almost complete. The final step is to finish the exterior by adding siding and trim.
Siding options include wood, vinyl, or fiber cement. Choose the material that best suits your budget and desired aesthetic. Cut the siding to size and attach it to the exterior of the shed, making sure to leave room for expansion and contraction.
Finish off the edges and corners with trim pieces, which can also be made from wood, vinyl, or fiber cement. Paint or stain the exterior as desired to protect the wood and give your shed a polished look.
Add the Finishing Touches
Now that your shed is complete, it's time to add the finishing touches. Install windows and doors to allow light into the shed and provide easy access. Add shelves or storage units to keep your tools and equipment organized. Finally, decorate the interior and exterior with your personal touch.
Conclusion
Building a 10x12 lean-to shed is a challenging but rewarding DIY project. With careful planning, the right materials, and a solid understanding of the building process, you can create a functional and attractive storage space for your property. By following this step-by-step guide, you'll be well on your way to completing your own lean-to shed with double doors.


