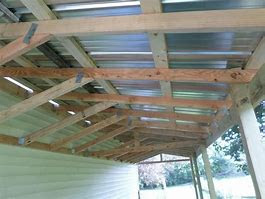
Are you in need of extra storage space for your outdoor tools, equipment, or other belongings? A lean to shed with a metal roof can be a practical and cost-effective solution. Building a lean to shed with a metal roof is a DIY project that requires careful planning, preparation, and execution. In this guide, we will walk you through the step-by-step process of building a lean to shed with a metal roof, providing you with expert tips and recommendations along the way. So grab your tools and let's get started!
Step 1: Choose the Right Location and Obtain Permits
The first step in building a lean to shed with a metal roof is to choose the right location. Consider factors such as accessibility, drainage, and proximity to other structures. Make sure the location is level and provides a stable foundation for your shed. Additionally, check with your local building department to determine if you need any permits or approvals for your lean to shed construction. It's important to comply with local building codes and regulations to ensure a safe and legal construction process.
Step 2: Gather Materials and Tools
Before you start building your lean to shed, gather all the necessary materials and tools. This includes the metal roofing materials, lumber, fasteners, concrete or gravel for the foundation, as well as tools such as a circular saw, drill, hammer, level, tape measure, and other basic woodworking tools. Make sure you have all the materials and tools on hand before you start the construction process to avoid delays and interruptions.
Step 3: Prepare the Foundation
The foundation is a crucial part of your lean to shed, as it provides stability and support for the structure. Depending on the size and design of your shed, you may need to pour a concrete slab or lay a gravel foundation. Follow the manufacturer's instructions or local building codes for the proper foundation preparation. Make sure the foundation is level and securely in place before proceeding to the next step.
Step 4: Build the Frame
The next step is to build the frame of your lean to shed. Start by measuring and cutting the lumber according to your shed's design and size. Use a circular saw to make accurate and precise cuts. Assemble the frame using wood screws or nails, following the plan's specifications. Make sure the frame is level, square, and securely fastened to the foundation. Double-check your measurements and adjustments to ensure a proper fit.
Step 5: Install Metal Roofing
Now it's time to install the metal roofing on your lean to shed. Follow the manufacturer's instructions for the specific type of metal roofing you are using. Start from one end and work your way to the other, overlapping the panels according to the manufacturer's recommendations. Use appropriate fasteners, such as screws or nails, to secure the roofing panels to the frame. Make sure the panels are aligned, level, and tightly fastened to prevent water leaks and ensure a durable roof.
Step 6: Add Doors, Windows, and Finishing Touches
Once the metal roofing is installed, you can add doors, windows, and other finishing touches to your lean to shed. Install doors and windows according to the manufacturer's instructions, making sure they are properly aligned, level, and securely fastened. You may also want to add vents for proper ventilation and insulation to keep your shed comfortable and dry. Finish the shed with paint or stain to protect it from the elements and enhance its appearance. Follow the manufacturer's recommendations for painting or staining metal roofing to ensure proper adhesion and durability.
Step 7: Clean up and Inspect
After completing the construction of your lean to shed with a metal roof, it's essential to clean up the construction site and inspect the shed for any potential issues. Remove any debris or leftover materials from the construction process and tidy up the surrounding area. Inspect the shed for any gaps, leaks, or structural concerns. Make necessary repairs or adjustments to ensure the shed is safe, functional, and visually appealing.
Conclusion
Building a lean to shed with a metal roof can be a rewarding DIY project that provides you with additional storage space and enhances the functionality of your outdoor area. By following the steps outlined in this guide, you can confidently construct a lean to shed with a metal roof that is durable, weather-resistant, and visually appealing. Remember to plan carefully, gather all the necessary materials and tools, follow the manufacturer's instructions, and comply with local building codes and regulations. With proper planning and execution, you can enjoy the benefits of a well-built lean to shed with a metal roof for years to come!


