Friday, March 31, 2023

Building Codes and Permits for a Lean-To Shed

When it comes to building a lean-to shed, there are a few important things to keep in mind, especially regarding building codes and permits. Building codes are regulations that dictate how buildings should be constructed to ensure they are safe and structurally sound. Permits, on the other hand, are official documents that allow you to undertake a construction project legally.

In this article, we will discuss the key considerations you need to keep in mind when building a lean-to shed, including building codes and permits. We will cover the following topics:

  • What is a lean-to shed?
  • Building codes for lean-to sheds
  • Permits for lean-to sheds
  • How to get a permit for a lean-to shed
  • Conclusion

What is a Lean-To Shed?

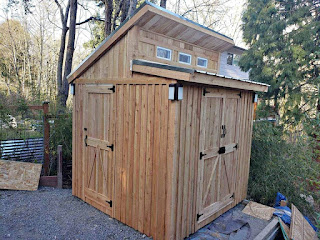
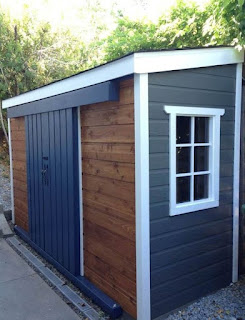
A lean-to shed is a small, one-story structure that is typically used for storage. It is usually attached to the side of a larger building or structure and is supported by the existing wall. Lean-to sheds are typically used to store garden tools, lawn equipment, and other outdoor items.

Building Codes and Permits for a Lean-To Shed

Lean-to sheds are popular among homeowners because they are relatively easy to build and can be customized to fit the specific needs of the homeowner. They are also less expensive than traditional detached sheds because they require fewer materials.

Building Codes for Lean-To Sheds
Building codes are regulations that are put in place to ensure that buildings are constructed safely and to a high standard. Building codes are enforced by local government authorities and must be followed by anyone undertaking a construction project.

When building a lean-to shed, you must ensure that it meets the building codes in your local area. The specific building codes that apply to your shed will depend on your location, but there are a few general requirements that are likely to apply:

Size and Height: The size and height of your lean-to shed will be determined by local building codes. Typically, the maximum height allowed for a shed is 12 feet, and the maximum size is around 200 square feet. However, these limits can vary depending on your location, so it's important to check with your local authorities before you start building.

Foundation: Lean-to sheds must be built on a foundation that is solid and level. Depending on your location, you may be required to use a concrete slab or footings to ensure that the foundation is strong enough to support the weight of the shed.

Materials: The materials used to build your lean-to shed must be strong and durable. Typically, wood is the most common material used for shed construction, but other materials such as metal or plastic may be allowed depending on your location.

Roofing: The roofing material used for your shed must be able to withstand the elements and protect the shed from water damage. Asphalt shingles or metal roofing are common choices for shed roofing.

Ventilation: Proper ventilation is important for preventing moisture buildup in your shed. Depending on your location, you may be required to include vents or other forms of ventilation in your shed.

Electrical and Plumbing: If you plan to include electrical or plumbing in your lean-to shed, you will need to ensure that it meets the local building codes for these systems.

Permits for Lean-To Sheds
In addition to meeting the building codes for your area, you will also need to obtain the necessary permits before you can start building your lean-to shed. Permits are official documents that allow you to undertake a construction project legally.

The specific permits that you will need for your shed will depend on your location, but in general, you will need a building permit and possibly an electrical or plumbing permit. The building permit will allow you to construct your shed in compliance with local building codes, while the electrical and plumbing permits will ensure that any wiring or plumbing is installed safely and legally.


It's important to note that failing to obtain the necessary permits can result in fines and legal action. Additionally, if you try to sell your home in the future and it is discovered that your shed was built without the required permits, it can make the sale of your home more difficult.

How to Get a Permit for a Lean-To Shed

Obtaining the necessary permits for your lean-to shed can be a time-consuming process, but it is necessary to ensure that your shed is built safely and legally. Here are the steps you will need to follow to obtain a permit for your lean-to shed:

Check with Your Local Authorities: The first step in obtaining a permit for your lean-to shed is to check with your local authorities to determine the specific requirements for your location. This may include contacting your local building department or zoning board.

Prepare Your Plans: Once you have determined the requirements for your location, you will need to prepare detailed plans for your shed. This may include drawings, specifications, and a list of materials.

Submit Your Plans: Once your plans are complete, you will need to submit them to the appropriate authorities for review. This may involve filling out an application and paying a fee.

Wait for Approval: After you have submitted your plans, you will need to wait for them to be reviewed and approved. This process can take several weeks, depending on your location and the complexity of your project.

Start Construction: Once you have received approval for your permit, you can begin construction on your lean-to shed. It's important to follow the approved plans and comply with all building codes and regulations during the construction process.

Schedule Inspections: After you have completed construction, you will need to schedule inspections to ensure that your shed meets all building codes and regulations. This may include inspections for the foundation, framing, electrical, and plumbing systems.

Receive Final Approval: Once your shed has passed all inspections, you will receive final approval for your project. This will allow you to use your lean-to shed legally and sell your home in the future without any issues.


Conclusion

Building a lean-to shed can be a great way to add storage space to your property, but it's important to follow the building codes and obtain the necessary permits to ensure that your shed is built safely and legally. By checking with your local authorities, preparing detailed plans, and following the permit and inspection process, you can build a high-quality lean-to shed that will serve you for years to come.

Thursday, March 30, 2023

Classic Cottage Garden Shed: A DIY Lean-to Shed Plan


If you're looking for a DIY project that can add both beauty and functionality to your garden, a classic cottage garden shed may be just what you need. This charming and practical structure can be built as a lean-to shed, which makes it perfect for small spaces. In this article, we'll provide step-by-step instructions for building your own classic cottage garden shed, with a focus on lean-to shed plans.

Step 1: Planning Your Classic Cottage Garden Shed

Before you begin building your classic cottage garden shed, it's important to plan out the project carefully. This will ensure that you have all the materials you need and that your shed will fit perfectly in your garden space. Here are some key considerations:

Choose a Location

Think about where you want to place your garden shed. Consider factors like sunlight, accessibility, and drainage. Make sure that the location you choose is level and that there are no underground utilities or structures that could be damaged during construction.

Determine the Size

Decide on the size of your garden shed based on your storage needs and the available space in your garden. Consider what you will be storing in the shed and plan for additional space if you have any future storage needs.

Select a Design

There are many classic cottage garden shed designs to choose from. Look for a design that matches the style of your home and garden. You can find many lean-to shed plans online that can help you get started.

Step 2: Gather Materials and Tools

Once you have your shed plans, it's time to gather your materials and tools. Here are some of the things you will need:

Materials

  • Lumber
  • Plywood
  • Roofing materials (e.g., shingles, metal panels)
  • Nails and screws
  • Hardware (e.g., hinges, door handles)
  • Paint or stain

Tools

  • Saw
  • Hammer
  • Drill
  • Screwdriver
  • Tape measure
  • Square

Step 3: Build the Foundation

The foundation is an important part of your garden shed. It provides stability and prevents moisture from seeping into the shed. Here's how to build a simple foundation for your lean-to shed:

1. Mark Out the Foundation

Use stakes and string to mark out the foundation of your shed. Make sure that the corners are square and that the foundation is level.

2. Dig the Holes

Using a post hole digger, dig holes for the corner posts. The holes should be deep enough to reach below the frost line in your area.

3. Set the Posts

Place the corner posts in the holes and fill them with concrete. Make sure that the posts are plumb and level.

4. Add the Crossbeams

Cut two crossbeams to the length of the shed and attach them to the corner posts with screws. These crossbeams will provide additional support for the shed floor and walls.

5. Install the Floor Frame

Cut two floor joists to the length of the shed and attach them to the crossbeams with nails. Then, cut the floorboards to size and nail them to the floor joists.

Step 4: Build the Walls

With the foundation in place, it's time to start building the walls of your lean-to shed. Here's how:

1. Cut the Wall Studs

Cut the wall studs to the height of the shed walls, minus the thickness of the top and bottom plates. Then, cut the top and bottom plates to the length of the shed walls and nail them to the studs.

2. Assemble the Walls

Use the wall studs and plates to assemble the walls of your garden shed. Make sure that the walls are square and that the studs are spaced evenly.

3. Add the Windows and Doors

If you want to add windows or doors to your shed, now is the time to do it. Cut the openings in the walls and install the windows and doors according to the manufacturer's instructions.

Step 5: Install the Roof

The roof is the final step in building your classic cottage garden shed. Here's how to install the roof:

1. Install the Roof Rafters

Cut the roof rafters to size and nail them to the top plates of the shed walls. Make sure that the rafters are spaced evenly and that they are at the correct angle.

2. Add the Roof Sheathing

Cut the roof sheathing to size and nail it to the roof rafters. You can use either plywood or OSB for the sheathing.

3. Install the Roofing Materials

Finally, install the roofing materials of your choice. This could be shingles, metal panels, or another material. Follow the manufacturer's instructions for installation.

Step 6: Finish the Shed

With the roof installed, your garden shed is almost complete. Here are a few final steps to finish the shed:

1. Paint or Stain the Shed

Paint or stain the shed to protect it from the elements and give it a finished look. Choose a color that complements the style of your home and garden.

2. Install Shelving and Storage

Install shelving and storage to make the most of your shed space. You can buy pre-made shelving units or build your own.

3. Add a Pathway and Landscaping

Add a pathway to your garden shed and landscape around it to create a charming and welcoming space in your garden.

Conclusion

Building a classic cottage garden shed is a great DIY project that can add both beauty and functionality to your garden. By following these step-by-step instructions for a lean-to shed plan, you can create a charming and practical garden shed that you'll enjoy for years to come.

Wednesday, March 29, 2023

How to Build a Lean-To Shed: A Step-by-Step Guide


How to Build a Lean-To Shed Step-by-Step Guide

Introduction

A classic cottage garden shed can be a beautiful and practical addition to any backyard. It's a great place to store tools, lawn equipment, and gardening supplies, or even to use as a workspace or relaxation spot. In this step by step guide, we will take you through the process of building your own classic cottage garden shed, from planning and designing to construction and finishing.

Step 1: Planning and Design

Before you start building, you need to plan and design your shed. This will involve determining the size, style, and location of your shed, as well as choosing materials and creating a blueprint.

Size and Style

Consider the purpose of your shed and the amount of space you have available when determining the size and style. A classic cottage garden shed typically has a small footprint and a simple, rustic design that blends in with the surrounding landscape.

Location

Choose a location that is level and well-drained, and that receives plenty of sunlight. Consider the proximity to other structures and the view from your home and garden.

Materials

When choosing materials, consider durability, cost, and aesthetic appeal. Wood is a popular choice for a classic cottage garden shed, but other options include metal, vinyl, and composite materials.

Blueprint

Create a detailed blueprint of your shed that includes measurements, materials, and construction details. This will help you stay organized and on track throughout the building process.

Step 2: Foundation and Framing

Once you have your plan in place, you can start building your shed. The first step is to create a foundation and frame.

Foundation

Choose a foundation type that is appropriate for your soil and climate. A popular option for a classic cottage garden shed is a simple concrete slab, but you can also use a gravel or paver base.

Framing

Start by building the frame of your shed using pressure-treated lumber. Use a level to ensure that the frame is square and plumb, and secure the boards with galvanized screws or nails.

Step 3: Walls and Roof

With the foundation and framing in place, it's time to add the walls and roof.

Walls

Build the walls using the same pressure-treated lumber and secure them to the frame with galvanized screws or nails. You can add windows and doors at this stage, as well as any decorative features like shutters or trim.

Roof

Construct the roof using plywood sheathing and roofing materials of your choice. A simple gable roof is a popular choice for a classic cottage garden shed.

Step 4: Finishing Touches

With the walls and roof in place, it's time to add finishing touches to your shed.

Paint or Stain

Choose a paint or stain that complements your home and garden, and apply it to the exterior of your shed. This will protect the wood from weather and give it a polished look.

Interior Features

Add shelves, hooks, and other interior features to make the most of your shed's storage or workspace potential.

Step 5: Maintenance and Upkeep

Once your classic cottage garden shed is complete, it's important to maintain and upkeep it to ensure its longevity and functionality.

Cleaning and Repairs

Regularly clean and inspect your shed for any signs of wear or damage. Make repairs as necessary to prevent further damage and extend the lifespan of your shed.

Seasonal Care

Depending on your climate, you may need to take additional measures to protect your shed during extreme weather conditions, such as sealing cracks or reinforcing the roof.

Conclusion

Building a classic cottage garden shed can be a fun and rewarding project that adds both beauty and function to your backyard. By following this step by step guide, you can create a unique and timeless structure that will serve you well for years to come.

Remember to always prioritize safety, use appropriate tools and materials, and consult professional help if needed. Happy building!

Tuesday, March 28, 2023

Best Location for a Lean-To Shed


Best Location for a Lean-To Shed

If you are looking for extra storage space or a place to work on your hobbies, a lean-to shed can be a great solution. However, finding the right location for your shed is crucial to ensure it serves its purpose and lasts for years to come. Here is a step-by-step guide on how to find the best location for your classic cottage garden shed.

Step 1: Check Your Local Building Codes

Before you start looking for a location, it's essential to check your local building codes to ensure you can legally build a shed on your property. Some cities or neighborhoods have specific regulations regarding the size, height, and placement of sheds. Make sure you know these requirements before you start building to avoid any legal issues.

Step 2: Determine the Purpose of Your Shed

Once you know you can legally build a shed, determine its purpose. Will it be used for storage, a workshop, or a combination of both? This will help you decide on the size and location of your shed.

Storage Shed

If you need a shed for storage, you'll want it to be easily accessible. Consider placing it near your home's entrance or garage for easy access. You may also want to place it close to the area where you need the stored items, such as gardening tools or sports equipment.

Workshop Shed

If you plan to use your shed as a workshop, you'll want a location that provides enough natural light and ventilation. Consider placing it near a window or under a tree that provides shade. You'll also want to have enough space for a workbench and any other tools you plan to use.

Step 3: Consider the Terrain

When selecting a location for your shed, consider the terrain. Ideally, you'll want a flat area to avoid having to level the ground, which can be expensive and time-consuming. If you have a sloped yard, you may need to build a retaining wall or adjust the height of your shed to ensure it's level.

Step 4: Look for Drainage

Another essential factor to consider is drainage. You don't want your shed to be in an area that's prone to flooding or standing water. Make sure the location you choose has proper drainage to avoid water damage to your shed and its contents.

Step 5: Check for Sun and Shade

Depending on your shed's purpose, you'll want to consider the amount of sun and shade it will receive. If you plan to use it as a workshop, you'll want plenty of natural light, but if you plan to use it for storage, you'll want to avoid direct sunlight to prevent damage to your belongings.

Step 6: Determine Accessibility

Accessibility is also an important factor to consider. Make sure your shed is easily accessible from your home or garage to make it easy to move items in and out. You'll also want to ensure you can easily access the shed in any weather conditions, such as snow or rain.

Step 7: Consider Your Home's Aesthetics

Finally, consider the aesthetics of your home when choosing a location for your lean-to shed. You'll want to select a location that complements your home's style and blends in with your landscaping. You may also want to consider painting your shed to match the color of your home or adding plants and flowers around it to create a cohesive look.

Step 8: Evaluate Your Property Lines

Before you start building, make sure you know where your property lines are. You don't want to accidentally build on your neighbor's property or violate any zoning laws. Check your property survey or hire a surveyor to determine your property lines.

Step 9: Choose a Foundation

Once you've selected the location for your shed, you'll need to choose a foundation. A foundation helps level the shed and protects it from moisture. You can choose from several types of foundations, including concrete, wood, or gravel. Choose a foundation that's appropriate for the terrain and location of your shed.

Step 10: Prepare the Site

Before you start building, you'll need to prepare the site. Clear any debris or plants from the area and ensure the ground is level. If necessary, add a layer of gravel or sand to help with drainage. You may also need to install a retaining wall or adjust the height of your shed to ensure it's level.

Step 11: Build the Shed

Now that you've chosen the location, foundation, and prepared the site, it's time to build your shed. Follow the manufacturer's instructions carefully and use the appropriate tools and materials. If you're not comfortable building it yourself, consider hiring a professional to help.

Step 12: Add Finishing Touches

Once your shed is built, you can add finishing touches to make it functional and attractive. Consider adding shelves, hooks, or pegboards for storage. You may also want to paint or stain the exterior to match your home's color scheme. Adding plants and flowers around the shed can also help it blend in with your landscaping.

Step 13: Maintain Your Shed

To ensure your shed lasts for years to come, you'll need to maintain it regularly. Check for any signs of damage, such as leaks or rotting wood. Keep the interior and exterior clean and organized. Regularly apply a waterproof sealant to protect it from moisture.

Step 14: Enjoy Your New Lean-To Shed

With the right location and proper maintenance, your lean-to shed can be a valuable addition to your home. Use it for storage, a workshop, or as a relaxing retreat. Enjoy the extra space and convenience it provides.

Conclusion

Finding the right location for your lean-to shed is essential to ensure it serves its purpose and lasts for years to come. Follow these steps to choose a location that's level, well-drained, accessible, and complements your home's style. With proper maintenance and care, your shed can be a valuable addition to your home and property.

Monday, March 27, 2023

Tools Required for Building a Lean-To Shed

Tools Required for Building a Lean-To Shed

Building a lean-to shed is a great way to create extra storage space for your home or garden. Whether you need somewhere to store your garden tools or a place to keep your firewood dry, a lean-to shed can be a cost-effective and practical solution.

Tools  for Building a Lean-To Shed

Tools Required

Before you start building your lean-to shed, you will need to gather the right tools. Here are some of the essential tools you will need:

  • Measuring Tape - You will need a measuring tape to measure the dimensions of your shed and ensure everything is level.
  • Saw - A saw is necessary for cutting the wood to the right size and shape.
  • Hammer - A hammer is essential for nailing the wood together.
  • Nails - You will need a selection of nails in different sizes to suit your project.
  • Screwdriver - A screwdriver is useful for assembling the shed and fixing any loose screws.
  • Drill - If you have a lot of screws to insert, a drill can speed up the process.
  • Screws - You will need a selection of screws to match your project's requirements.
  • Level - A level is essential for ensuring everything is straight and level.
  • Clamps - Clamps can be useful for holding the wood in place while you work.
  • Safety Equipment - Don't forget to wear safety equipment, including goggles and gloves.

Other Considerations

Aside from the tools, there are other things to consider when building a lean-to shed. Here are some tips to keep in mind:

  • Location - Choose a location for your shed that is level and has good drainage.
  • Permits - Check with your local authorities if you need a permit to build a shed on your property.
  • Materials - Choose the right materials for your shed, including the type of wood and roofing materials.
  • Design - Plan your design carefully, including the dimensions and the door's location.
  • Budget - Set a budget for your project and stick to it.

Conclusion

Building a lean-to shed can be a rewarding DIY project that can provide you with extra storage space for your home or garden. With the right tools and careful planning, you can create a shed that is both functional and attractive.

Sunday, March 26, 2023

Foundation Options for a Lean to Shed

Foundation Options for a Lean to Shed

Introduction

If you're thinking of building a lean-to shed, one of the most important decisions you'll have to make is what type of foundation to use. The foundation is crucial to the stability and longevity of your shed, and choosing the wrong type could result in a costly and time-consuming mistake. In this article, we'll explore the different foundation options for a lean-to shed and help you decide which one is right for you.

What is a Lean-To Shed?

Before we dive into foundation options, let's first define what a lean-to shed is. A lean-to shed is a simple, single-roofed structure that is attached to the side of a larger building, such as a house or a garage. It typically has three walls and an open face, making it an ideal storage space for lawn equipment, gardening tools, and other outdoor items.

Why Build a Lean-To Shed?

There are several reasons why you might want to build a lean-to shed:
  • Additional storage space: A lean-to shed is an excellent way to add storage space to your property without taking up too much room
  • Easy access: Because a lean-to shed is attached to a larger building, it's easy to access your stored items whenever you need them.
  • Affordable: Compared to building a standalone shed, a lean-to shed is often more affordable because it requires fewer materials and less labor.
  • Space-saving: A lean-to shed is an ideal solution for smaller properties where space is limited.

Foundation Options for a Lean-To Shed

Now that we understand what a lean-to shed is and why you might want to build one, let's explore the different foundation options you have to choose from.

Gravel Foundation

A gravel foundation is one of the simplest and most affordable options for a lean-to shed. It involves digging out the area where you plan to build the shed, filling it with gravel, and then compacting the gravel down to create a level surface.

Concrete Pad

A concrete pad is a more permanent and durable foundation option for a lean-to shed. It involves pouring a concrete slab in the area where you plan to build the shed. A concrete pad provides a stable base for the shed and can also help to prevent moisture from seeping into the shed.

Wooden Skid

A wooden skid foundation involves laying pressure-treated lumber on the ground in the area where you plan to build the shed. The lumber is then secured together to create a level surface for the shed to rest on.

Deck Blocks

Deck blocks are a quick and easy foundation option for a lean-to shed. They involve placing precast concrete blocks on the ground in the area where you plan to build the shed. The blocks are then leveled and used to support the shed.

Concrete Piers

Concrete piers are a more advanced foundation option for a lean-to shed. They involve digging holes in the ground, pouring concrete into the holes, and then placing precast concrete piers on top of the concrete. The piers are then used to support the shed.

Factors to Consider When Choosing a Foundation Option

When deciding which foundation option to use for your lean-to shed, there are several factors you'll want to consider:
  • Cost: Different foundation options vary in cost, so you'll need to consider your budget when making your decision.
  • Size and weight of the shed: Larger and heavier sheds will require a more substantial foundation to support them.
  • Levelness of the ground: If the ground where you plan to build your shed is not level, you may need to choose a foundation option that allows for more flexibility in leveling.
  • Climate and weather: Depending on the climate and weather conditions in your area, certain foundation options may be more suitable than others.

How to Build a Foundation for a Lean-To Shed

The process for building a foundation for a lean-to shed will vary depending on the foundation option you choose. However, here are some general steps you can follow:
  1. Clear the area where you plan to build the shed.
  2. Mark out the perimeter of the shed using stakes and string.
  3. Dig out the area to the depth required for your chosen foundation option.
  4. Fill the area with your chosen foundation material, such as gravel or concrete.
  5. Compact the foundation material down to create a level surface.
  6. If necessary, add additional layers of foundation material until you reach the desired depth.
  7. If using a wooden skid foundation, secure the pressure-treated lumber together using screws or nails.
  8. If using deck blocks or concrete piers, place them on the foundation material and use a level to ensure they are even.
  9. If using a concrete pad, pour the concrete into the area and use a float to smooth it out.
  10. Allow the foundation to cure or settle for the recommended amount of time before beginning construction on the shed.

Conclusion

A lean-to shed can be a great addition to your property, providing convenient and affordable storage space. When choosing a foundation option for your shed, it's important to consider factors such as cost, size and weight of the shed, levelness of the ground, and climate and weather conditions. By carefully considering your options and following the appropriate steps for building your foundation, you can ensure that your lean-to shed is a sturdy and long-lasting structure.

Saturday, March 25, 2023

Adding Insulation to a Lean-to Shed


Adding Insulation to a Lean-to Shed

Thursday, March 23, 2023

Siding Options for a Lean To Shed

Siding Options for a Lean To Shed

When it comes to building a lean-to shed, choosing the right siding material is crucial for its longevity and appearance. Siding not only protects the structure from the elements but also adds to the overall aesthetic appeal of the shed. There are several siding options available in the market, and choosing the right one depends on your budget, preferences, and the weather conditions in your area. In this article, we will discuss some popular siding options for a lean-to shed.

1. Wood Siding

Wood siding is one of the most popular choices for a lean-to shed due to its natural beauty and versatility. It is available in different types of wood, such as cedar, pine, and redwood, and can be painted or stained to match your home's exterior. However, wood siding requires regular maintenance, such as staining or painting, to prevent rotting and insect damage.

2. Vinyl Siding

Vinyl siding is another popular option for a lean-to shed due to its low maintenance and affordability. It is available in different colors and styles, such as clapboard, board and batten, and shingle, and can withstand harsh weather conditions, such as high winds and heavy rain. However, vinyl siding is not as durable as wood and can crack or fade over time.

3. Metal Siding

Metal siding, such as steel or aluminum, is a durable and low maintenance option for a lean-to shed. It is available in different styles, such as corrugated, ribbed, and standing seam, and can be painted or coated to prevent rusting. Metal siding is also fire-resistant and can withstand high winds and heavy rain. However, metal siding can be noisy during rain or hail and can dent or scratch easily.

4. Fiber Cement Siding

Fiber cement siding is a newer option for a lean-to shed and is made of a mixture of cement, sand, and cellulose fibers. It is available in different styles, such as lap siding, shingle, and panel, and can be painted or stained to match your home's exterior. Fiber cement siding is durable, low maintenance, and resistant to rot, insects, and fire. However, it is heavier and more expensive than other siding options.

5. Composite Siding

Composite siding is a blend of wood fibers, resin, and wax, and is a popular option for a lean-to shed due to its durability and low maintenance. It is available in different styles, such as clapboard and shingle, and can be painted or stained to match your home's exterior. Composite siding is resistant to rot, insects, and fire, and can withstand harsh weather conditions. However, it is more expensive than vinyl siding and can fade or crack over time.

Conclusion

Choosing the right siding for your lean-to shed depends on your budget, preferences, and the weather conditions in your area. Wood siding offers natural beauty and versatility but requires regular maintenance. Vinyl siding is affordable and low maintenance but not as durable as wood. Metal siding is durable and low maintenance but can be noisy and prone to denting. Fiber cement siding is durable and resistant to rot, insects, and fire but heavier and more expensive. Composite siding is durable and low maintenance but more expensive than vinyl siding. Consider these factors before choosing the best siding option for your lean-to shed.

Roofing Options for a Lean to Shed

Roofing options for a lean to shed

Introduction

Adding a lean-to shed to your property can provide additional storage space, a workspace, or even a living area. When building a lean-to shed, one of the most important decisions you will make is choosing the right roofing option. The roof not only protects the shed from the elements but also plays a significant role in the shed's overall appearance and durability. In this article, we will discuss the various roofing options available for a lean-to shed and provide information to help you make an informed decision.

Considerations for Choosing a Roofing Option

Before selecting a roofing option for your lean-to shed, there are several factors to consider:

  • Budget: Your budget will play a significant role in determining which roofing option you choose.
  • Climate: The climate in your area will impact the durability and performance of your shed's roof.
  • Aesthetics: The roofing option you choose will affect the overall look of your shed.
  • Maintenance: Some roofing options require more maintenance than others.
  • Installation: Certain roofing options are easier to install than others.

Asphalt Shingles

Asphalt shingles are one of the most popular roofing options for lean-to sheds. They are affordable, easy to install, and come in a variety of colors and styles. Asphalt shingles are also durable and can last up to 20 years with proper maintenance. They work well in areas with moderate to high rainfall, as they provide good water resistance.

When choosing asphalt shingles, it is essential to select high-quality shingles that are suitable for your climate. In areas with high winds, it is recommended to choose shingles with a higher wind rating to ensure they can withstand strong gusts.

Metal Roofing

Metal roofing is another popular option for lean-to sheds. It is durable, long-lasting, and requires minimal maintenance. Metal roofing is also fire-resistant and works well in areas with high wildfire risk. It is available in a variety of colors and styles, and some options can even mimic the look of other roofing materials like tile or asphalt shingles.

One drawback of metal roofing is that it can be noisy during heavy rainfall or hail. However, this can be addressed by installing insulation or adding soundproofing materials to the interior of the shed.

Rolled Roofing

Rolled roofing is a budget-friendly option for lean-to sheds. It is made of the same materials as asphalt shingles but comes in larger rolls that are easier to install. Rolled roofing is suitable for sheds with low-slope roofs and can last up to 10 years with proper maintenance. It is available in a limited number of colors and styles, but it can provide adequate protection from the elements.

One disadvantage of rolled roofing is that it is not as durable as other roofing options and may need to be replaced more frequently.

Cedar Shakes

Cedar shakes provide a unique and rustic look to lean-to sheds. They are made from natural cedar and are environmentally friendly. Cedar shakes are also durable and can last up to 30 years with proper maintenance. They work well in areas with low to moderate rainfall and can provide good insulation during the colder months.

However, cedar shakes are more expensive than other roofing options and require more maintenance. They may also be more susceptible to damage from insects and wildlife.

Tile Roofing

Tile roofing is a high-end option for lean-to sheds that provides a classic and elegant look. It is available in a variety of materials, including clay, concrete, and slate, and can last up to 100 years with proper maintenance. Tile roofing is fire-resistant and works well in areas with high wildfire risk. It is also resistant to insects and rot.

One disadvantage of tile roofing is that it is heavy and requires a sturdy structure to support it. It is also more expensive than other roofing options and can be challenging to install.

Rubber Roofing

Rubber roofing is a modern and eco-friendly option for lean-to sheds. It is made from recycled materials and is highly durable and long-lasting. Rubber roofing is also resistant to damage from UV rays and weather extremes. It is available in a variety of colors and styles and can be installed on low-slope roofs.

One disadvantage of rubber roofing is that it can be more expensive than other roofing options. It may also be more challenging to find qualified professionals to install it.

Conclusion

Choosing the right roofing option for your lean-to shed is a significant decision that requires careful consideration. Factors like budget, climate, aesthetics, maintenance, and installation should all be taken into account when selecting a roofing option. Asphalt shingles, metal roofing, rolled roofing, cedar shakes, tile roofing, and rubber roofing are all viable options that provide different benefits and drawbacks. By understanding these options and considering your specific needs, you can make an informed decision that will provide the best protection and appearance for your lean-to shed.

Wednesday, March 22, 2023

How to Build a 16x20 Shed on Skids

16x20 shed plans materials list

Building a shed on skids can be a great option if you need a portable or temporary structure, or if you don't want to pour a concrete foundation. Skids are beams or runners that the shed rests on, allowing it to be easily moved or relocated. Here's a step-by-step guide on how to build a 16x20 shed on skids. how big is it?

Materials and Tools

Before you start, gather the following materials and tools:
  • Lumber for framing, sheathing, and roofing
  • Nails, screws, and other fasteners
  • Roofing material (such as shingles or metal panels)
  • Door(s) and window(s) (if desired)
  • Skids (treated lumber recommended)
  • Concrete blocks or other supports for skids
  • Level, tape measure, saw, drill, hammer, and other basic carpentry tools

Step 1: Prepare the Site

Choose a level and well-drained location for your shed. Clear the area of any debris, rocks, or vegetation. If necessary, use a shovel or a rake to level the ground. Place concrete blocks or other supports at the corners and along the length of the skids to ensure stability and prevent moisture damage.

Step 2: Build the Floor Frame

Using treated lumber, build the floor frame according to your shed plans or design. Measure and cut the lumber to the appropriate lengths, and assemble the frame using nails or screws. Make sure the frame is square and level, and attach it securely to the skids using appropriate fasteners.

Step 3: Install the Floor Sheathing

Once the floor frame is in place, install the floor sheathing. Use plywood or OSB (oriented strand board) for the sheathing, and attach it to the floor frame using nails or screws. Make sure the sheathing is flush with the edges of the floor frame and spans the entire area.

Step 4: Build the Wall Frames

Next, build the wall frames according to your shed plans or design. Measure and cut the lumber to the appropriate lengths, and assemble the frames using nails or screws. Make sure the frames are plumb and square, and attach them to the floor frame using appropriate fasteners.

Step 5: Install the Wall Sheathing

Once the wall frames are in place, install the wall sheathing. Use plywood or OSB for the sheathing, and attach it to the wall frames using nails or screws. Make sure the sheathing is flush with the edges of the wall frames and spans the entire height of the walls.

Step 6: Install the Roof Rafters

Measure and cut the lumber for the roof rafters according to your shed plans or design. Install the rafters at the desired spacing, and attach them to the top plates of the wall frames using appropriate fasteners. Make sure the rafters are plumb and level, and that they are evenly spaced according to your layout plan.

Step 7: Install the Roof Sheathing

Once the roof rafters are in place, install the roof sheathing. Use plywood or OSB for the sheathing, and attach it to the rafters using nails or screws. Make sure the sheathing is flush with the edges of the rafters and spans the entire roof area.

Step 8: Install the Roofing Material

After the roof sheathing is installed, it's time to add the roofing material. Depending on your preference and budget, you can use shingles, metal panels, or other roofing material. Follow the manufacturer's instructions for installation, and make sure the roofing material is properly secured and waterproofed.

Step 9: Install Doors and Windows

If desired, you can now install doors and windows to your shed. Measure and cut the openings according to your plans, and install the doors and windows using appropriate hardware. Make sure they are properly sealed and aligned for a secure and weatherproof fit.

Step 10: Finish the Shed

With the main structure of the shed complete, you can now finish the interior and exterior as desired. This may include adding insulation, electrical wiring, interior walls, and exterior siding or paint. Follow local building codes and regulations, and ensure that all finishes are properly installed for safety and durability.

Step 11: Check for Level and Stability

Before you start using your shed, make sure to check for level and stability. Use a level to ensure that the shed is sitting evenly on the skids, and make any necessary adjustments. Double-check that all fasteners are secure, and that the shed is stable and safe to use.

Step 12: Enjoy Your 16x20 Shed on Skids

Congratulations! You've successfully built a 16x20 shed on skids. Now you can enjoy your new shed, whether you're using it for storage, a workshop, or any other purpose. Remember to maintain your shed regularly by checking for any signs of wear and tear, and addressing them promptly to ensure its longevity. In conclusion, building a 16x20 shed on skids can be a practical and cost-effective option for those who need a portable or temporary structure. 

By following these steps and using appropriate materials and tools, you can create a sturdy and functional shed that meets your needs. Remember to always follow local building codes and regulations, and seek professional assistance if needed. Good luck with your shed building project!

Cost of Building a Lean To Shed


Cost of Building a Lean To Shed

Building a lean-to shed can be a great way to add extra storage space to your property. It can serve as a shelter for your tools, lawn equipment, and even vehicles. However, before embarking on a lean-to shed project, it is essential to understand the costs involved. The cost of building a lean-to shed depends on several factors, such as the size, materials, and location. In this article, we will discuss the cost of building a lean-to shed and what factors influence the final price.

Factors That Affect the Cost of Building a Lean To Shed

The cost of building a lean-to shed can vary depending on the following factors:

  • Size: The size of the shed is a significant factor in determining the cost. The larger the shed, the more materials and labor will be required, leading to a higher cost.
  • Materials: The choice of materials for building a lean-to shed can have a significant impact on the cost. For instance, a shed built with premium materials like cedar will cost more than one built with pine or composite materials.
  • Location: The location of the shed can also influence the cost. If the site requires leveling or clearing of trees, the cost can increase significantly.
  • Permits: Depending on the location, a building permit may be required to construct a shed. The cost of obtaining a permit can vary depending on the jurisdiction.

The Average Cost of Building a Lean To Shed

The cost of building a lean-to shed can range from $500 to $5000, depending on the factors mentioned above. On average, the cost of building a lean-to shed is around $1500.

Breakdown of the Costs Involved

Here is a breakdown of the costs involved in building a lean-to shed:

  • Materials: The cost of materials for building a lean-to shed can range from $500 to $3500. The cost can vary depending on the choice of materials, such as wood, vinyl, or metal.
  • Labor: The cost of labor for building a lean-to shed can range from $300 to $2000. The cost can vary depending on the size of the shed and the experience of the contractor.
  • Permits: The cost of a building permit can vary depending on the location. The cost can range from $50 to $500.

How to Save Money When Building a Lean To Shed

Building a lean-to shed can be an expensive project, but there are ways to save money. Here are some tips:

  • Choose Affordable Materials: Instead of using premium materials, consider using more affordable options like pressure-treated lumber or composite materials.
  • Build it Yourself: Building the shed yourself can save you a significant amount of money on labor costs.
  • Shop Around: Compare prices from different suppliers and contractors to find the best deals.
  • Choose a Simple Design: A simple design with fewer details can save you money on materials and labor costs.

Conclusion

Building a lean-to shed can be a practical and cost-effective way to add storage space to your property. However, it is essential to understand the factors that influence the cost and plan accordingly. By considering the factors mentioned above, you can estimate the cost of building a lean-to shed and choose materials and designs that fit your budget. If you are looking for a more affordable option, consider building the shed yourself or choosing more affordable materials. However, keep in mind that building a shed requires some level of expertise and experience, and it is essential to ensure that the shed is structurally sound and complies with local building codes. In conclusion, the cost of building a lean-to shed can vary depending on several factors, including size, materials, location, and permits. By understanding these factors and following some money-saving tips, you can build a functional and affordable lean-to shed that meets your storage needs.

Tuesday, March 21, 2023

How to Build 10x12 Lean To Shed: A Step-by-Step Guide


10x12 lean to shed plans diy

Building a 10x12 lean-to shed can be a great addition to your backyard, providing extra storage space for your tools, equipment, and outdoor gear. Whether you're a seasoned DIYer or just starting out, building a shed is an achievable project that can be completed over a few weekends. In this step-by-step guide, we'll walk you through the process of building a 10x12 lean-to shed from start to finish.

Materials List

The first step in building a shed is to gather all the necessary materials. Here's a list of the materials you'll need:

  • 4x4 pressure-treated lumber (for the foundation)
  • 2x4 and 2x6 lumber (for framing)
  • Plywood (for sheathing)
  • Roofing materials (shingles or metal)
  • Double doors and hardware
  • Screws, nails, and other fasteners
  • Tools (circular saw, drill, hammer, level, etc.)

Make sure to measure and cut all lumber and plywood to the appropriate lengths before starting construction.

Step-by-Step Guide

Step 1: Prepare the site

The first step in building a shed is to prepare the site. Choose a flat and level area of your backyard where you want the shed to be located. Use stakes and string to mark out the perimeter of the shed, and then dig a shallow foundation for the shed. Fill the foundation with gravel or crushed stone to create a level surface.

Step 2: Build the foundation

Use 4x4 pressure-treated lumber to build the foundation of the shed. Cut the lumber to the appropriate length, and then use a level to ensure that the foundation is level and square. Anchor the lumber to the ground using stakes or concrete anchors, and then add a layer of gravel or crushed stone to the top of the foundation.

Step 3: Build the frame

Next, it's time to build the frame of the shed. Use 2x4 and 2x6 lumber to construct the frame, following the plans for the shed. Make sure to use a level and square to ensure that the frame is straight and true. Secure the frame together using screws or nails, and then add diagonal bracing to provide extra stability.

Step 4: Sheath the walls and roof

After the frame is complete, it's time to sheath the walls and roof of the shed. Use plywood to cover the frame, starting with the walls and then moving onto the roof. Make sure to leave space for any windows or doors that will be installed, and cut out holes as needed.

Step 5: Install the roof

Now that your shed walls are up, it's time to add the roof. You'll need to install the roof trusses first, then the roof decking, and finally the roofing material.

Start by attaching the trusses to the top plates of the shed walls, spacing them evenly. Then, add the roof decking, which can be made from plywood or OSB. Secure the decking to the trusses with screws, making sure to stagger the seams.

Finally, add the roofing material of your choice. Popular options include asphalt shingles or metal roofing panels. Follow the manufacturer's instructions for installation, taking care to properly seal all edges and joints.

Finish the Exterior

With the roof installed, your shed is almost complete. The final step is to finish the exterior by adding siding and trim.

Siding options include wood, vinyl, or fiber cement. Choose the material that best suits your budget and desired aesthetic. Cut the siding to size and attach it to the exterior of the shed, making sure to leave room for expansion and contraction.

Finish off the edges and corners with trim pieces, which can also be made from wood, vinyl, or fiber cement. Paint or stain the exterior as desired to protect the wood and give your shed a polished look.

Add the Finishing Touches

Now that your shed is complete, it's time to add the finishing touches. Install windows and doors to allow light into the shed and provide easy access. Add shelves or storage units to keep your tools and equipment organized. Finally, decorate the interior and exterior with your personal touch.

Conclusion

Building a 10x12 lean-to shed is a challenging but rewarding DIY project. With careful planning, the right materials, and a solid understanding of the building process, you can create a functional and attractive storage space for your property. By following this step-by-step guide, you'll be well on your way to completing your own lean-to shed with double doors.

16x20 shed sizes How big Is It

16x20 shed sizes

If you are considering building a shed, one of the essential factors to consider is its size. A 16x20 shed is a popular size that can be used for a variety of purposes, such as storage, a workshop, or even a home office.

Dimensions

A 16x20 shed is 16 feet wide and 20 feet long. It has a total of 320 square feet of floor space, which is a decent size for most storage and workshop needs.

Height

The height of a 16x20 shed can vary depending on the design and style of the shed. Typically, the peak height is around 12 feet, with the walls ranging from 6 to 8 feet in height.

Uses

A 16x20 shed is a versatile size that can be used for various purposes. Some popular uses include:

  • Storage: A 16x20 shed can provide ample storage space for garden tools, lawnmowers, bicycles, and other outdoor equipment.
  • Workshop: With its spacious interior, a 16x20 shed can serve as a workshop for woodworking, metalworking, or other hobbies that require ample space.
  • Home Office: A 16x20 shed can also be converted into a home office, providing a quiet and private workspace away from the distractions of the main house.

Building Codes and Permits

Before building a 16x20 shed, it is essential to check local building codes and permit requirements. Building codes can vary depending on your location, so it is essential to research and ensure that your shed complies with all regulations.

Conclusion

A 16x20 shed is a versatile and practical size that can be used for various purposes. Its ample floor space and decent height make it an ideal choice for storage, workshop, or even a home office. Before building, it is essential to check local building codes and permit requirements to ensure compliance.

Sunday, March 19, 2023

a Guide 10x12 Lean to Shed Plans


10x12 Lean to Shed Plans

If you need some extra storage space or a workshop area, a lean to shed can be a great solution. A 10x12 lean to shed is a popular size that can fit most needs. Here are some things to consider when planning your 10x12 lean to shed:

Design Options

When it comes to designing a 10x12 lean to shed, there are several options to consider. Here are a few popular designs:

  • Single Slope Roof: This design features a single sloping roof, with the highest point at the back of the shed. It is a simple and easy-to-build design that can be a good option for a beginner builder.
  • Gable Roof: A gable roof has two sloping sides that meet at the peak in the center. This design is more complex than a single slope roof, but it offers more headroom and storage space.
  • Barn Style: A barn-style roof has a high peak in the center, with two sloping sides. This design is popular for its aesthetic appeal and extra storage space in the loft area.

Materials

The materials you choose for your 10x12 lean to shed will depend on your budget, climate, and personal preferences. Here are some common materials used:

  • Wood: Wood is a popular material choice for lean to sheds because it is durable, versatile, and aesthetically pleasing. It is also easy to work with and can be painted or stained to match your home's exterior.
  • Metal: Metal sheds are a popular option for those who want a low-maintenance and long-lasting shed. They are resistant to rot, insects, and fire, but they can be more expensive than wood sheds.
  • Vinyl: Vinyl sheds are becoming more popular due to their low-maintenance and durability. They are resistant to rot, insects, and rust, and they require little upkeep. However, they can be more expensive than other materials.

Building Plans

When building a 10x12 lean to shed, it is essential to have a detailed plan to follow. Here are some things to consider when choosing your building plans:

  • Level Ground: Make sure your building site is level and stable. This will ensure that your shed is stable and doesn't shift over time.
  • Permit Requirements: Check with your local building department to see if you need a permit to build your shed. Requirements can vary depending on your location.
  • Foundation: Your shed will need a sturdy foundation to ensure stability and prevent moisture damage. Consider using concrete piers, a gravel base, or a wooden foundation.

Conclusion

A 10x12 lean to shed can be a great addition to your backyard, providing extra storage or workspace. When planning your shed, consider the design options, materials, and building plans to ensure a successful project. With a little planning and effort, you can have a functional and attractive lean to shed in your backyard.

Saturday, March 18, 2023

Lean-to Shed with Loft: A Practical Guide to Building Your Own


Lean-to Shed with Loft A Practical Guide to Building Your Own
 
Are you in need of some extra storage space on your property? A lean-to shed with a loft might be the perfect solution. Not only does it offer ample storage space, but the loft area can also be used as a workshop, home office, or even a small living space. In this article, we will provide a step-by-step guide on how to build your own lean-to shed with a loft.

Materials Needed

Before you start building your lean-to shed with a loft, you will need to gather the necessary materials. The following list provides a general idea of what you will need:
  • Lumber (2x4s and 2x6s)
  • Plywood sheets
  • Roofing materials (shingles, metal roofing, or corrugated plastic)
  • Hardware (screws, nails, hinges, etc.)
  • Tools (circular saw, drill, hammer, level, etc.)
  • Concrete blocks or pier blocks (for the foundation)

Step 1: Foundation

The first step in building a lean-to shed with a loft is to prepare the foundation. This can be done by using either concrete blocks or pier blocks. Make sure the foundation is level before proceeding with the construction of the shed.

Step 2: Frame the Walls and Roof

After the foundation is set, it's time to start framing the walls and roof. The walls can be framed using 2x4s, while the roof should be framed using 2x6s. Make sure to leave space for a doorway and any windows you may want to install.

Step 3: Install the Plywood Sheathing

Once the walls and roof are framed, it's time to install the plywood sheathing. This will provide a solid base for the roofing materials to be installed later. Use screws to attach the plywood to the frame.

Step 4: Install the Roofing

With the plywood sheathing in place, it's time to install the roofing materials. This can be done using shingles, metal roofing, or corrugated plastic. Make sure to follow the manufacturer's instructions when installing the roofing.

Step 5: Build the Loft

After the roof is installed, it's time to start building the loft. This can be done using 2x4s or 2x6s. Make sure to leave space for any stairs or ladders you may want to install.

Step 6: Install the Windows and Door

Once the loft is in place, it's time to install the windows and door. This can be done using pre-made frames or by building your own frames using 2x4s. Make sure to properly seal around the frames to prevent any leaks.

Step 7: Finish the Interior

With the windows and door in place, it's time to finish the interior. This can be done by adding insulation, drywall, and flooring. The loft area can be left unfinished if you plan to use it as a workshop or storage space.

Step 8: Paint or Stain the Exterior

Finally, it's time to paint or stain the exterior of the shed. This will not only provide a finished look but will also help protect the wood from the elements.

Tips for Building a Lean-to Shed with a Loft

Here are some additional tips to keep in mind as you build your lean-to shed with a loft:
  • Plan out the size and placement of the shed before starting construction.
  • Make sure the foundation is level and secure.
  • Consider adding a ramp or steps for easier access to the loft area.
  • Use quality materials that are appropriate for your climate.
  • Include plenty of ventilation to prevent mold and mildew growth.
  • Consider adding shelves or other storage solutions to maximize space.

Choosing the Right Roofing Material

One important decision you will need to make when building a lean-to shed with a loft is choosing the right roofing material. Some popular options include:
  • Asphalt shingles: These are a popular and affordable choice for roofing.
  • Metal roofing: This type of roofing is durable and long-lasting.
  • Corrugated plastic: This is a lightweight and inexpensive option that is easy to install.

Adding Insulation

If you plan to use your shed as a workshop or small living space, it may be a good idea to add insulation to keep the interior comfortable. Fiberglass batts or spray foam insulation are both effective options.

Finishing Touches

Once the construction of your lean-to shed with a loft is complete, you can add some finishing touches to make it your own. This could include adding a coat of paint or stain, installing gutters, or adding landscaping around the exterior. Overall, building a lean-to shed with a loft is a great DIY project that can add value and functionality to your property. With some basic carpentry skills and the right materials, you can create a sturdy and attractive shed that will serve your needs for years to come.

Conclusion

Building a lean-to shed with a loft is a practical and cost-effective way to add extra storage space or a small living area to your property. By following the steps outlined in this guide, you can build your own shed and customize it to fit your specific needs. Remember to take your time during the construction process and follow all safety precautions. With a little effort, you can have a functional and attractive shed that will provide you with years of use.

Tuesday, March 14, 2023

10x12 lean to shed plans with double doors

10x12 lean to shed plans with double doors

A 10x12 lean-to shed with double doors is an excellent option for those who need extra storage space for outdoor equipment and tools. Building your own shed may seem daunting, but with the right plan and tools, it can be an achievable DIY project. In this guide, we will walk you through the steps of building a 10x12 lean-to shed with double doors.

Step 1: Choose Your Site

The first step is to choose the perfect site for your shed. Select a level area that has good drainage and is easily accessible. Make sure to check with your local building codes to ensure that you are following any necessary regulations.

Step 2: Gather Your Materials and Tools

You will need basic tools such as a saw, drill, and hammer, as well as lumber, roofing materials, and hardware. A list of materials and tools required for the project can be found in your shed plan.

Step 3: Build the Foundation

A solid foundation is crucial for the durability and stability of your shed. You can use concrete blocks, a concrete slab, or treated lumber as your foundation. Make sure to level the foundation properly before building the shed.

Step 4: Construct the Frame

The next step is to construct the frame of your shed. Use treated lumber for the foundation and frame, and follow the shed plan for dimensions and measurements. Ensure that the walls are plumb and square, and brace them securely.

Step 5: Install the Roof

Attach the roof to the frame using roofing screws, making sure to overlap the roofing materials to ensure proper water drainage. Make sure to follow the plan for roof pitch and overhang measurements.

Step 6: Install the Double Doors

Double doors are an excellent feature for easy access to your shed. Follow the shed plan for measurements and placement, and use hinges and door handles to install the doors properly.

Step 7: Add Finishing Touches

Add any finishing touches to your shed, such as trim, paint, or stain. This will not only make your shed look great but also provide protection from the elements.

Conclusion

Building your own 10x12 lean-to shed with double doors is an achievable DIY project that can provide you with extra storage space and functionality. Follow these simple steps and your shed plan, and you'll have a sturdy and durable shed in no time.

Monday, March 13, 2023

How Much Does it Cost to Build a Lean-to Shed?


How Much Does it Cost to Build a Lean-to Shed

A lean-to shed is a great way to add storage space to your backyard or property. Not only is it a practical solution for storing tools and equipment, but it can also be a stylish addition to your outdoor space. However, before starting your project, it's important to consider the cost of building a lean-to shed.

Factors Affecting the Cost

The cost of building a lean-to shed will depend on several factors, including:

  • The size of the shed
  • The materials used
  • The location of the shed
  • The complexity of the design
  • The cost of labor in your area

The Size of the Shed

The size of the shed is one of the most significant factors affecting the cost. Generally, the larger the shed, the more expensive it will be. A smaller shed, such as an 8x10 or 10x12, will cost less than a larger shed, such as a 12x20 or 16x24.

The Materials Used

The cost of materials is another significant factor. The materials used can range from inexpensive to high-end, depending on your preference and budget. Common materials for a lean-to shed include wood, metal, and vinyl.

Wood is a popular option for those who prefer a natural look and feel. However, it requires regular maintenance to prevent rot and decay. Metal is a durable and low-maintenance option, but it may not be as aesthetically pleasing as wood. Vinyl is a relatively new option that offers the look of wood without the maintenance requirements.

The Location of the Shed

The location of the shed can also affect the cost. If you live in an area with a high cost of living, the cost of labor may be more expensive. Additionally, if the shed is located on a slope or uneven terrain, it may require additional site preparation, which can increase the cost.

The Complexity of the Design

The design of the shed can also affect the cost. A simple, rectangular design will be less expensive than a more complex design that includes multiple levels or angles.

The Cost of Labor

The cost of labor will vary depending on your location and the contractor you choose. It's important to get several quotes from different contractors to ensure you're getting a fair price.

Conclusion

In summary, the cost of building a lean-to shed can vary significantly depending on several factors. A smaller shed made of less expensive materials will cost less than a larger shed made of high-end materials. The location of the shed and the complexity of the design can also affect the cost. Finally, the cost of labor will depend on your location and the contractor you choose.

Overall, it's important to carefully consider all of these factors before starting your project to ensure that you stay within your budget.

4x8 Lean to Shed Plans: Free PDF and Material List

4x8 Lean to Shed

A lean to shed is a great option for those who want to create additional storage space on their property without taking up too much room. If you're looking to build a small lean to shed, a 4x8 design may be the perfect solution. In this article, we'll provide you with free PDF plans and a material list to help you build your own 4x8 lean to shed.

Benefits of a 4x8 Lean to Shed

Building a 4x8 lean to shed offers a number of benefits. Some of these benefits include:
  • Requires minimal space: A 4x8 lean to shed requires very little space compared to other shed designs.
  • Cost-effective: A smaller shed typically costs less to build and requires fewer materials.
  • Easier to build: A smaller shed can be built in a shorter amount of time and with less complexity.

Free 4x8 Lean to Shed Plans

Below are the free PDF plans for a 4x8 lean to shed: download

Material List

Here is the material list you'll need to build a 4x8 lean to shed:
  • 3 pressure-treated 4x4x8' for skids
  • 6 pressure-treated 2x4x8' for joists
  • 12 pressure-treated 2x4x8' for walls and door
  • 2 pressure-treated 2x6x8' for headers
  • 6 sheets of 1/2" plywood for walls and roof
  • 1 sheet of 3/4" plywood for the door
  • 1 roll of roofing felt
  • 1 box of roofing nails
  • 1 box of exterior screws

Conclusion

If you're in need of additional storage space but don't have much room to work with, a 4x8 lean to shed may be the perfect solution. With these free PDF plans and material list, you'll have everything you need to get started on building your own 4x8 lean to shed. Remember to always follow proper safety procedures and building codes when constructing any structure on your property.

Sunday, March 12, 2023

12x10 Shed Plans And Material List Download

12x10 Shed Plans And Material List Download

Building a shed can be a great addition to your property, providing valuable storage space and a place to work on hobbies and projects. If you're considering building a 12x10 shed, it's important to have a materials list to ensure you have everything you need for the project.

Size and Design

A 12x10 shed provides 120 square feet of space, which can be used for a variety of purposes. Before you begin building, it's important to decide on the design and layout of your shed. Consider the intended use of the shed, as well as any local zoning and building codes that may apply.

Materials List

Here's a general list of materials you'll need to build a 12x10 shed:

  • Foundation materials, such as concrete blocks or gravel
  • Pressure-treated 4x4s for the skids and floor joists
  • Pressure-treated 2x4s for the wall framing, door and window framing, and roof framing
  • Exterior-grade plywood for the walls, roof sheathing, and floor decking
  • Roofing materials, such as asphalt shingles or metal roofing panels
  • Siding materials, such as vinyl or wood
  • Doors and windows
  • Nails, screws, and other fasteners
  • Hardware, such as hinges and door handles

The exact materials you'll need will depend on the design of your shed, as well as your local building codes and climate. For example, if you live in an area with heavy snow loads, you may need to use thicker roof framing and sheathing materials to support the weight of the snow.

Cost of Materials

The cost of materials for a 12x10 shed can vary depending on the quality of the materials you choose and your location. In general, you can expect to spend anywhere from $500 to $5,000 or more on materials alone. It's a good idea to get quotes from several suppliers to ensure you're getting the best price.

Conclusion

Building a 12x10 shed can be a rewarding project that adds value to your property. With a solid materials list and careful planning, you can ensure a successful and enjoyable building experience.